How to Design a Rustic Grazing Table for a Wedding
If you want to know how to design a rustic grazing table for a wedding, you’ve come to the right place. This week we had my daughter’s wedding reception. She was going for a vintage, rustic feel. I was in charge of the food and she requested a grazing table. I love creating charcuterie board displays, so I was excited by the prospect of designing an entire table of colorful foods in contrasting shapes, textures, flavors, and colors !
Rustic Grazing Table Ideas for a Wedding
This post contains ads.
The big day finally rolled around after their year-long engagement. Like any wedding reception, there were a few minor glitches, but I was able to pull off the grazing table and got lots of compliments on the beautiful display! (A little further into the post you’ll see my rustic grazing table video so that you can see more details.)
Okay, are you ready to learn how to create a DIY grazing table for a wedding? Let’s get started!
DIY Simple Grazing Table Food Ideas
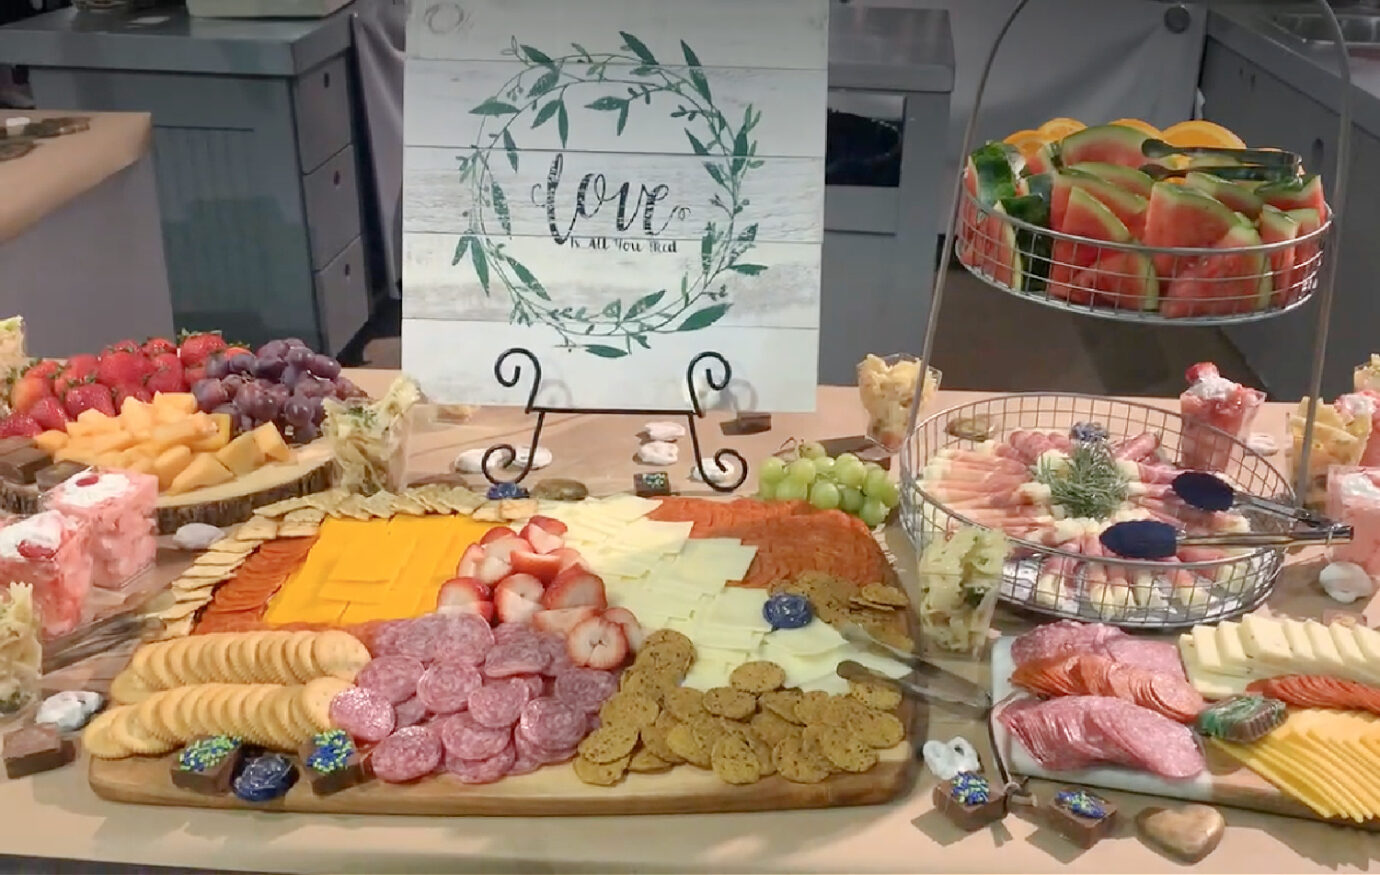
Grazing tables can have pretty much whatever food you like. The point is a table covered with all sorts of tasty options, in a wide variety so there is something for everyone.
Plan for a lot of finger foods such as breads, meats, fruits, and cheeses. I found those were the items that needed replenishing the most during the reception.
How to Make a Rustic Grazing Table for a Wedding
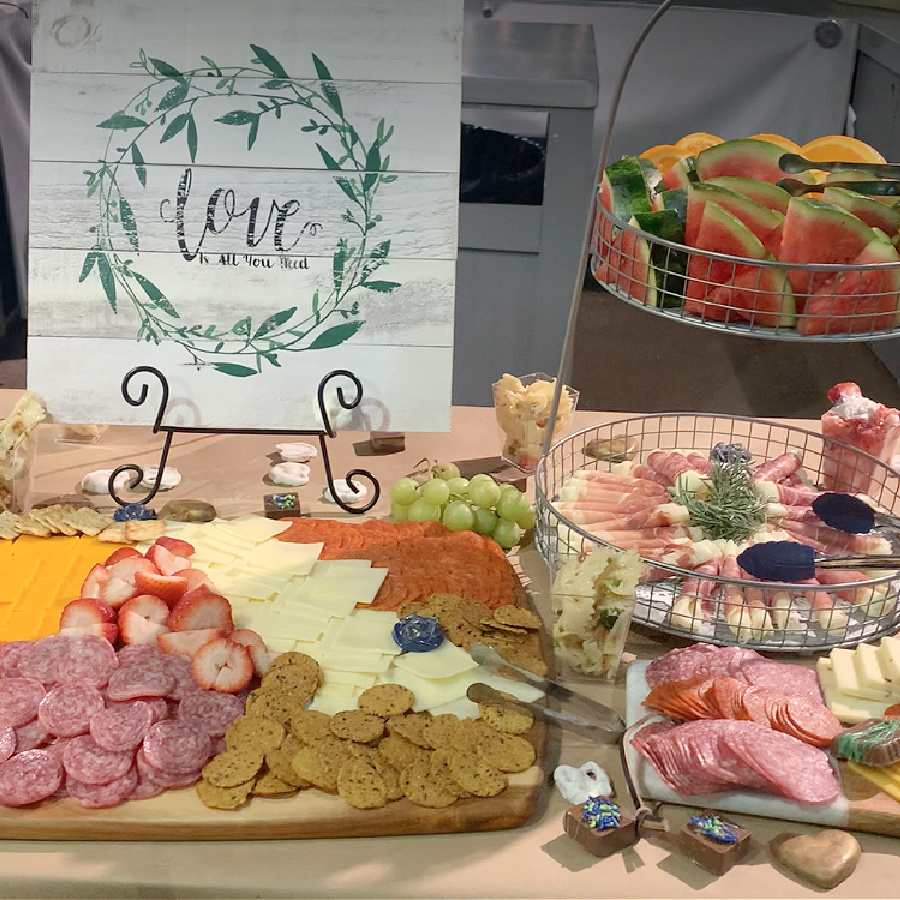
If you take on the task of creating a grazing table for a wedding, you know that it has got to be gorgeous! The keys to how to make the perfect grazing table are having lots of color, a variety of tasty foods, and visually appealing shapes and textures. Using beautiful charcuterie boards, rustic baskets, and vintage cake stands will add to the visual appeal.
Materials
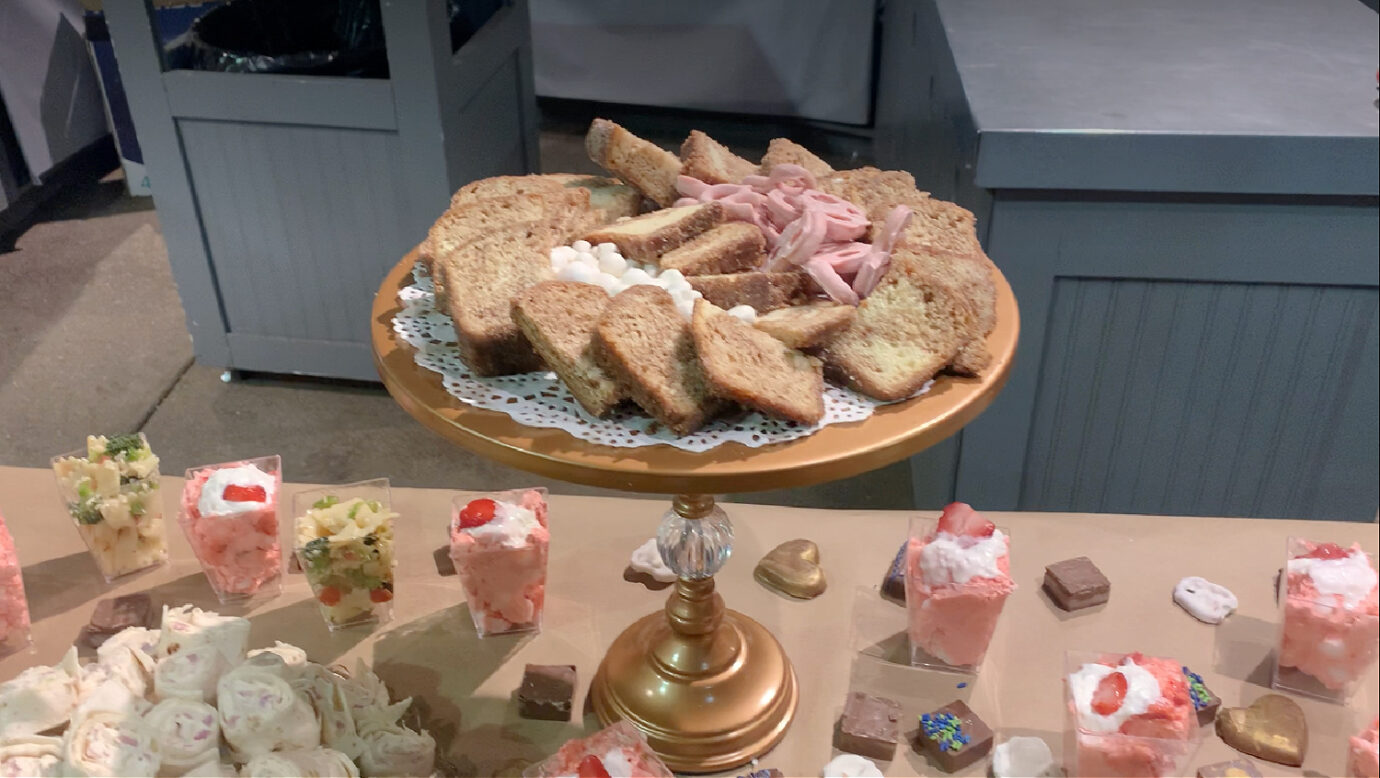
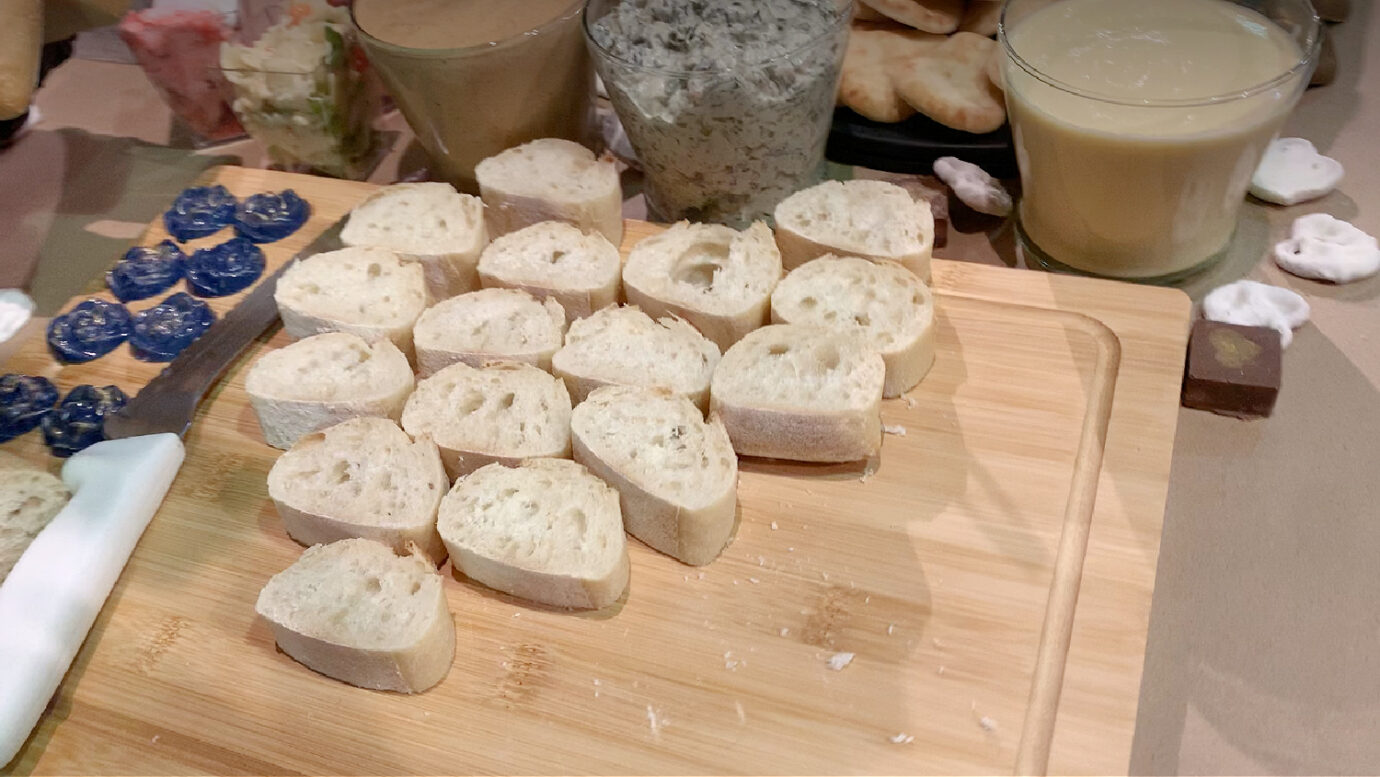
- Assorted breads: Baguettes, Challah, Brioche, Mini naan bread, Mini croissants, Multigrain artisan breads
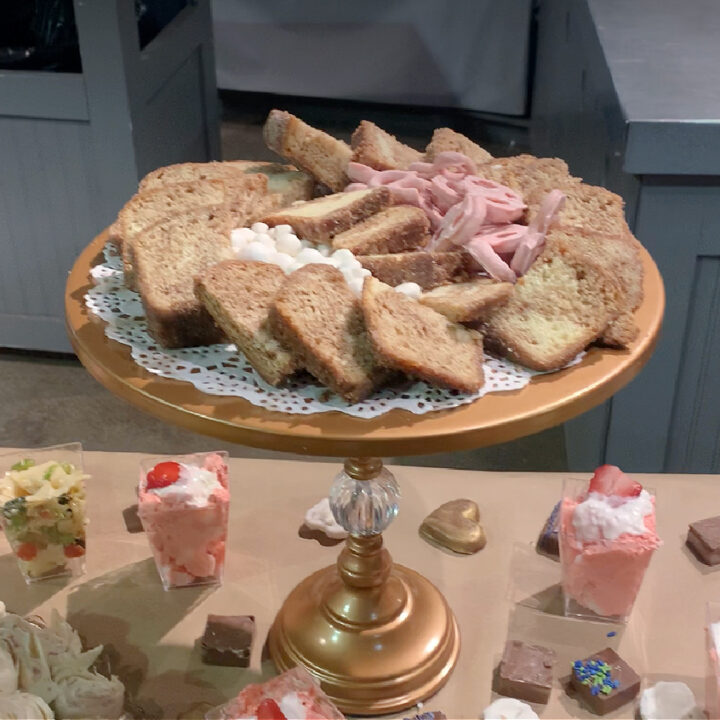
- Sweet breads: Lemon bread, Cinnamon bread, Strawberry swirl bread, Blueberry bread
- An assortment of crackers: I did a combination of common ones (like Ritz) that everybody likes and less common ones like sweet potato crackers, multigrain crackers, or other crackers with unique shapes and colors
- Spreads and dips: Honey-butter, Chipotle, Honey Mustard, Spinach dip, Ranch dressing
- Jams and apple butter
- Meats: Salami, Pepperoni, Prosciutto, Ham, Turkey
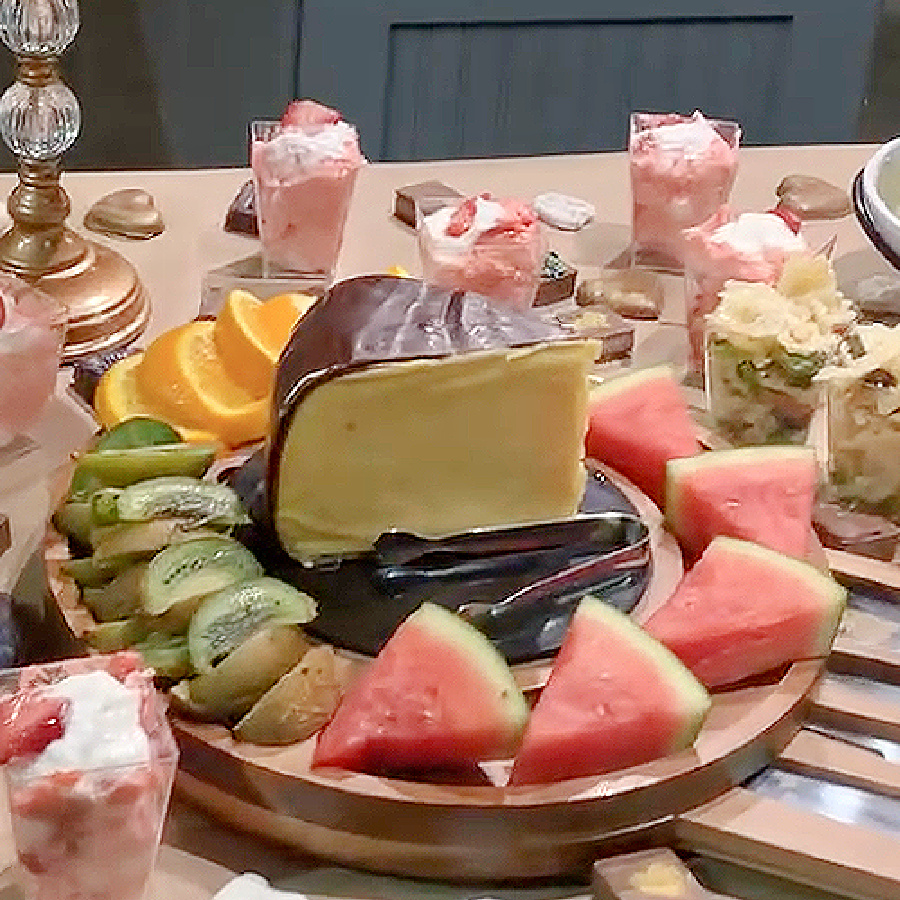
- Cheeses: Cheddar, Swiss, Gouda, Provolone, Pepper Jack, Monterey Jack, Colby Jack, Goat Cheese (goat cheese drizzled with a little whole berry cranberry sauce is delicious spread on crackers!)
- Fresh fruits: Strawberries, Watermelon, Cantaloupe, Grapes in a variety of colors, Pineapple, Blueberries, Raspberries, Mangos, Kiwi
- Dried fruits: Dried Strawberries, Dried Mango, Dried Banana Chips, Dried Apples with Cinnamon and Sugar
- Fresh vegetables: Carrots, Cucumber slices, Celery sticks, Cauliflower, Broccoli
- Nuts: Almonds, Walnuts, Pecans, Honey-roasted peanuts (Note: I did not use nuts because I have a nephew with a severe nut allergy)
- Small dessert dishes with fruit salads or pasta salads in them (I used strawberry fluff and marinated pasta salad
- Small treats to scatter in the empty places (chocolates, almond bark pretzels, yogurt covered raisins, or other treats)
- Barbecue meatballs or little smokies
- Other appetizers (I made some pinwheels)
- Beverages (drink dispensers can make them cute)
Tools
- Charcuterie boards
- Cake stands
- Vintage baskets
- Tiered serving trays
- Press 'n Seal wrap
- Roll of brown or white butcher paper
- Drink dispensers
- Dessert cups
- Serving spoons/utensils
- Mini tongs
- Bread knife
- Cheese knife
- Beautiful disposable plates
- Clear or white disposable silverware
- Pretty napkins
Instructions
- As much as possible, make up your charcuterie boards ahead of time and cover them with press 'n seal wrap to hold the food in place during transport. If you haven't set up a charcuterie board before, you can learn about that in my How to Make Charcuterie Boards for Hosting a Party post.
- If you don't have charcuterie boards, check out my post The Best Charcuterie Boards to Use for a Party.
- Tiered food trays and cake stands are best prepped at the venue, so make sure to allow time for that.
- You might want to add a little greenery, like some eucalyptus or ivy.
- Use small 5 oz. dessert cups for fruit or pasta salad servings and scatter them in empty places on the table. I used strawberry fluff and marinated pasta salad.
- Scatter chocolates, almond bark pretzels, or other treats in the empty spaces between serving trays.
Notes
I recommend steering mostly toward using foods that don't have to be kept hot or cold. It makes your life a lot less stressful!
How to Set Up a Grazing Table for Weddings
If you agree to take on the task of creating a grazing table for a wedding, you know that it has got to be beautiful! The keys to how to make the perfect grazing table are color, variety, and delicious food.
Part of making a beautiful grazing table includes having beautiful trays and baskets on which you can display your food. Lovely matching drink dispensers can also add a touch of elegance.
It took a LOT of time (I’m talking months) to find all of the pretty baskets, charcuterie boards, cake stands, and other serving trays I needed to give my grazing table a rustic, vintage feel. I don’t want you to have to spend so much time on that!
You can click the black buttons below to go to affiliate links to grazing table supplies and serving accessories like the ones that I used to beautify the grazing table:
Here are a few other affiliate links for the pretty marble cheese slicer that I used to prep for the grazing table, the cute gold rimmed cups we used for the punch, and a set of a dozen handy mini tongs with which people can serve themselves.
I thought that paper doilies dressed up the serving trays nicely. The disposable gold-rimmed plates and dessert cups were both pretty and useful! If you want to check them out, here are the affiliate links for those:
Grazing Table Prices
As you brainstorm about how to present your grazing table, you might wonder about wedding grazing table cost. Not counting the wedding cake and cupcakes, I spent around $1,000 on food. I could have done it a little cheaper, but I wanted it to be beautiful, colorful, and delicious.
I also spent money on display items, like charcuterie boards and cake stands. I have buttons with affiliate links for some of those later in the post, in case you want to check them out for your grazing table.
If you know people who entertain, check with them. You might be able to borrow some display items and save a bit of money. I was able to borrow a few of my display boards, so thankfully I didn’t have to buy all of them!
Make Your Own DIY Grazing Table
Now you know how to make a grazing table! Make it your own by using your own favorite foods, charcuterie boards, and even tie in the wedding colors a bit if you can! Remember to have drink dispensers!

If you make a grazing table, be sure to show me! Tag me on Instagram and show me a photo!
See you next time!
Deb