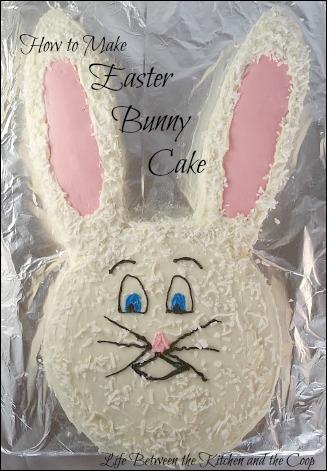
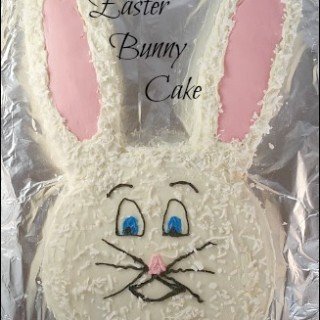
Easter Bunny Cake
With Easter coming soon, I thought it would be fun to share the “recipe” to show how to make this Easter Bunny Cake! Easter is coming soon! Are you excited? I sure am — I love holidays! I love it when there are occasions that spice life up a bit and make it more fun!
This Easter bunny cake is easy to decorate, even for a beginning cake decorator. If you have never decorated a cake before, don’t worry! There is a YouTube video toward the end of the post that will talk you through it…step by step!
How to Make Easter Bunny Cake
How to Make Easter Bunny Cake – Video
Check out this video on how to decorate an Easter Bunny Cake – my YouTube video walks you right through it!
Okay…now here are the step by step directions.
Making a Bunny Cake
Before you start, I just want to tell you that if you have never decorated a cake before, you can do this! This cake is pretty basic. There are also lots of simple cake ideas over on Betty Crocker’s website that you can check out.
First, you need to bake one round cake and one 9 x 13 cake as directed on the package. I think pretty much everyone on the planet knows how to do that, so I am not going to do step by step video for that part 🙂
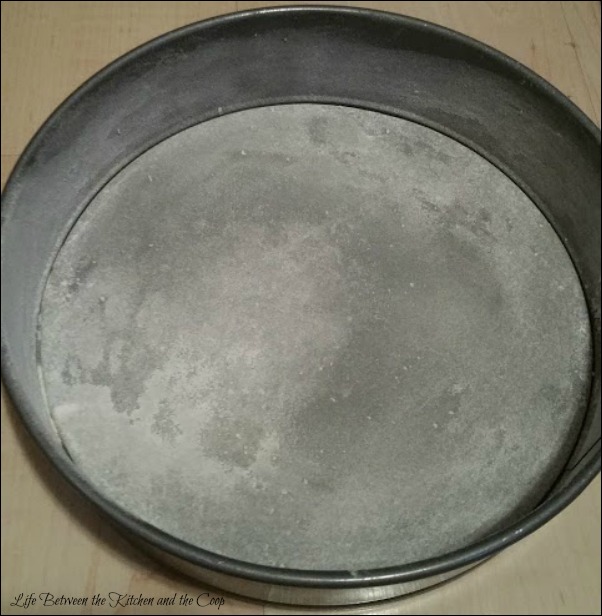
**The one thing you need to do differently is BEFORE you put the cake batter into the pans, spray the pans liberally with cooking spray and then put about 1/4 cup of flour in each pan.
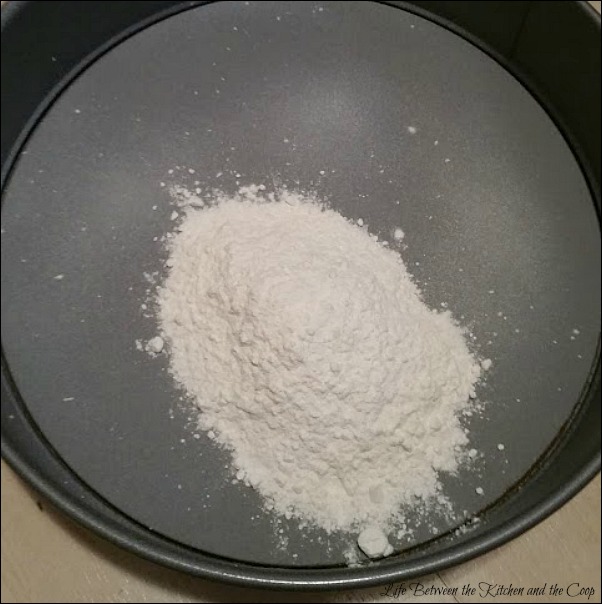
Rotate the pan until the bottom and sides are lightly coated with flour, then dump the excess flour in the trash. This is important! If you don’t do it your cake will stick to the pan when you flip it over!
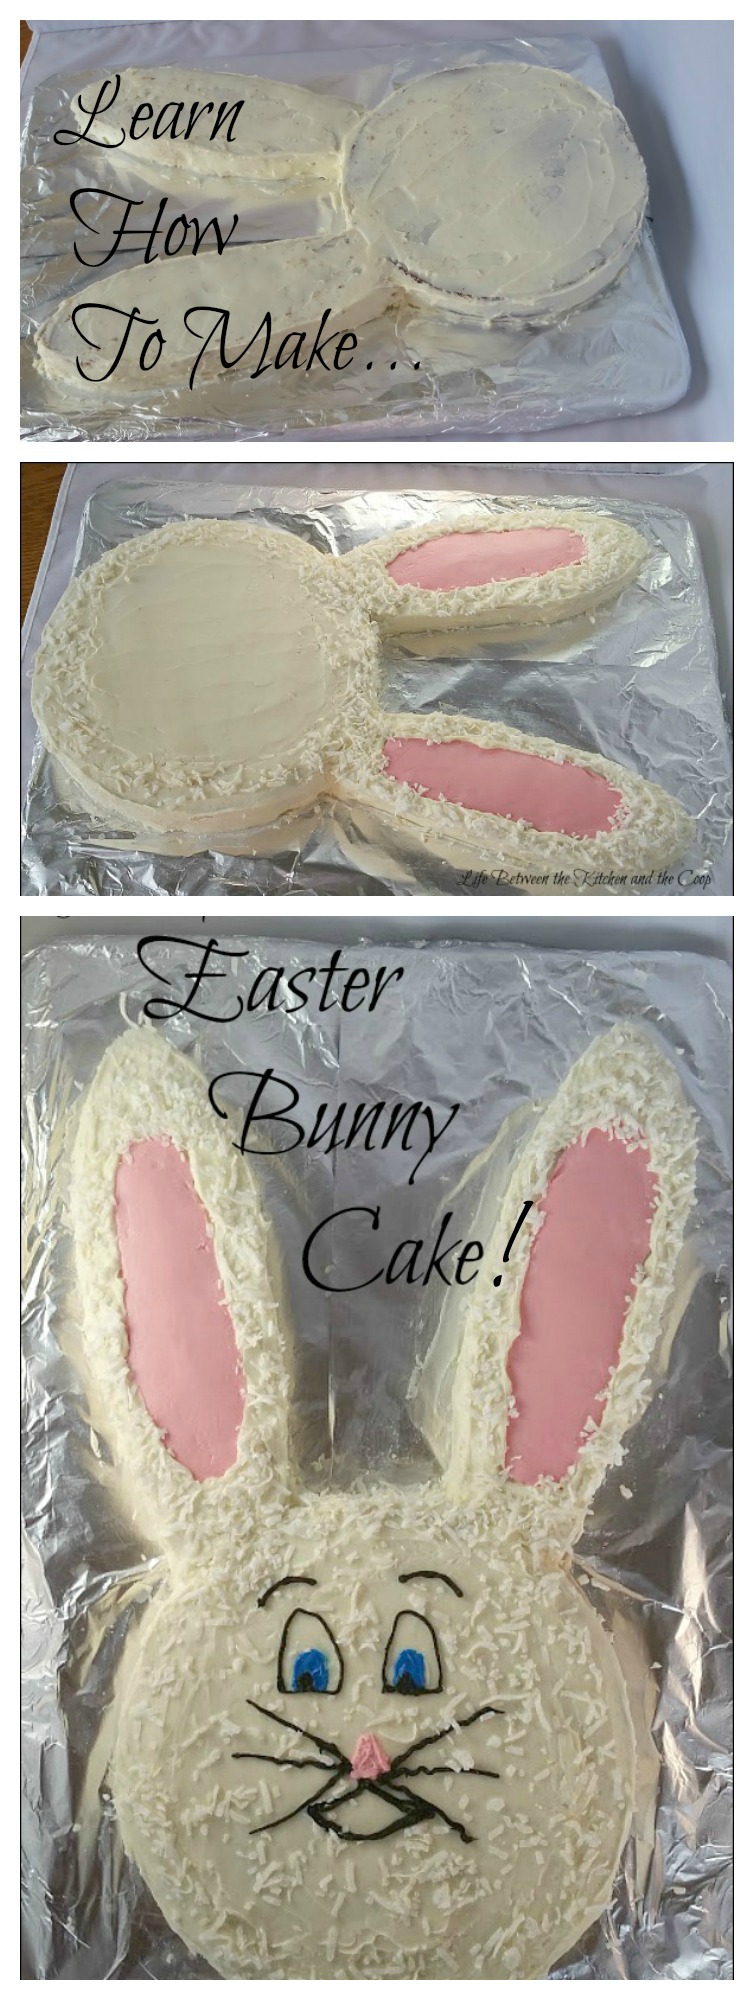
Once you have sprayed your baking pans and coated them with flour, they should look something like this:
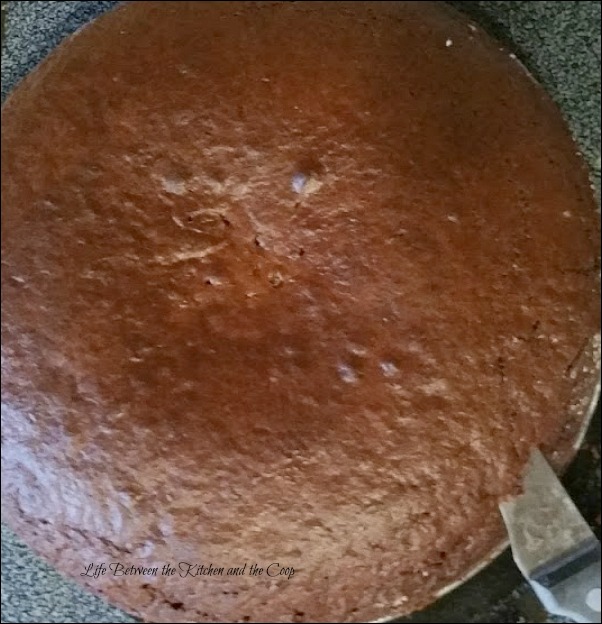
After you have baked the cakes, let them cool for a few minutes. When it has cooled for a few minutes, insert a knife along the edge of the cake and go all the way around the cake loosening the sides from the pan.
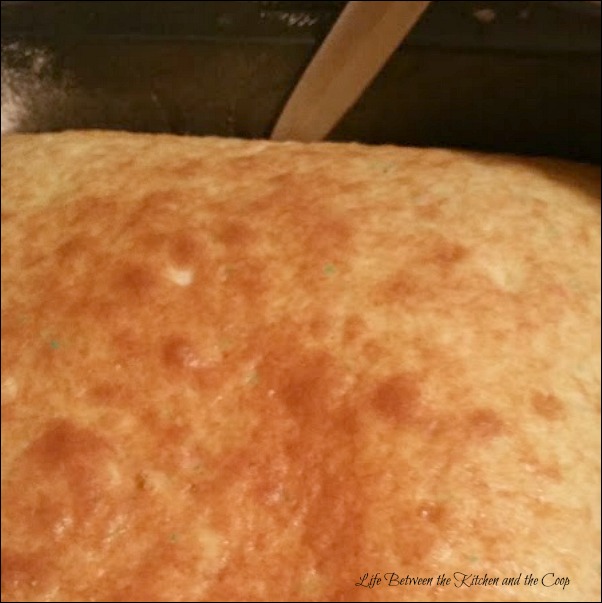
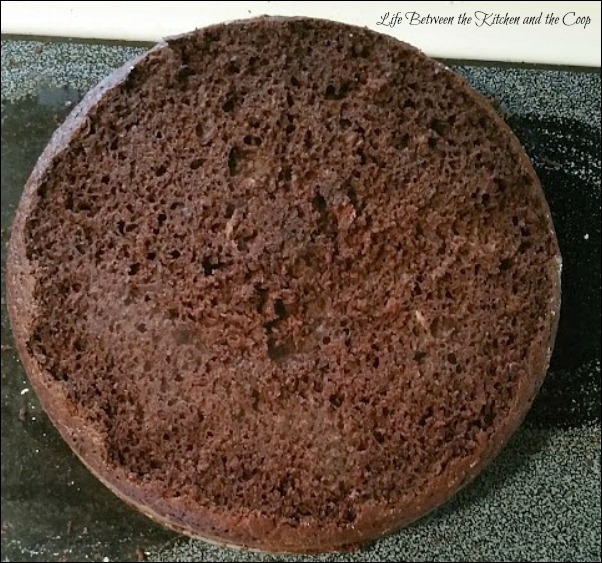
Then you will want to trim the excess curve of the cake off the top so that it is flat. If you don’t do that when you flip the cake over it will bend and crack.
Once you take off the rounded part of the cake, it will look like this:
Once you’ve done that you gently flip the cake over and onto the tray which you will use for decorating purposes. Remember to make sure the tray that the round cake goes onto is large enough for you to add the ears to later. (I use a large cutting board and wrap it with foil typically.)
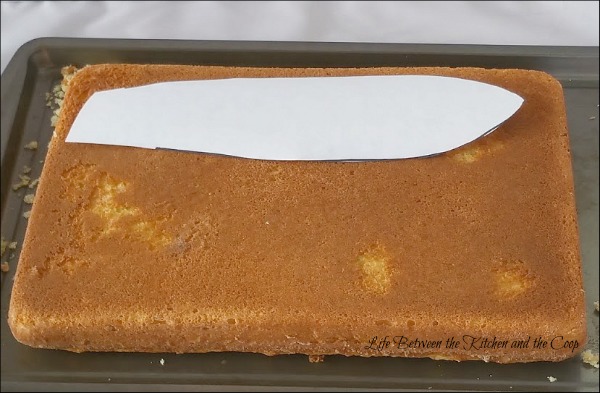
Before cutting out the bunny ears I usually freeze both cakes. It’s easier to decorate cakes when they’re frozen because you get fewer crumbs and avoid breakage of the cake when you glide the knife across it to frost.
Once both cakes are frozen, I cut out the bunny ears. Just draw them on paper and cut them out. I am not artistic at all and I did it…so can you!
Add the bunny ears above the round cake and position them properly. At this point the cake is still pretty Frozen so I usually go ahead and do my crumb coat. (If you’ve never done a crumb coat watch the video below and it talks about it fairly early on my YouTube video later in the post.)
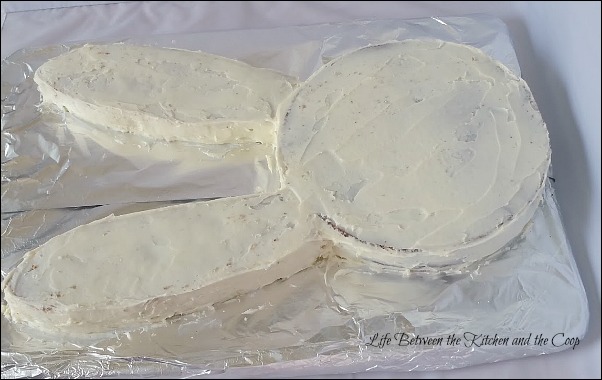
Once the crumb coat is finished, the cake needs to be frozen again for 2 or 3 hours to make the crumb coat icing firm. If you can’t fit whatever tray you have put the cake on into the freezer, refrigeration works okay, too.
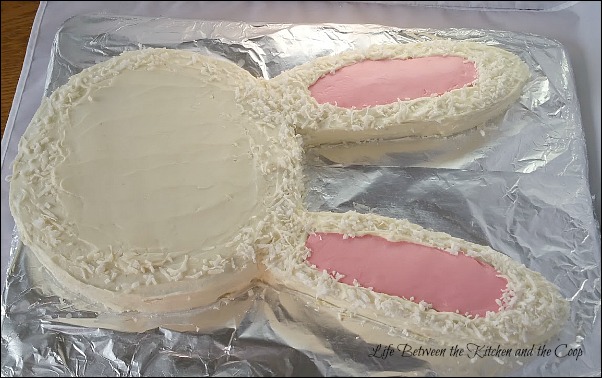
Once the crumb coat has firmed up, you can start by decorating the inside of the ears with pink frosting (see the picture).
Then you can frost the rest of the cake with white frosting to cover the crumb coat layer.
At this point (before you freeze the cake again), you can lightly press coconut flakes into the white frosting if you want, just to give it a little texture. I recommend that you don’t put the coconut on the face until after you’ve already made the mouth, whiskers, nose, and eyes. Check out the video for more detail!
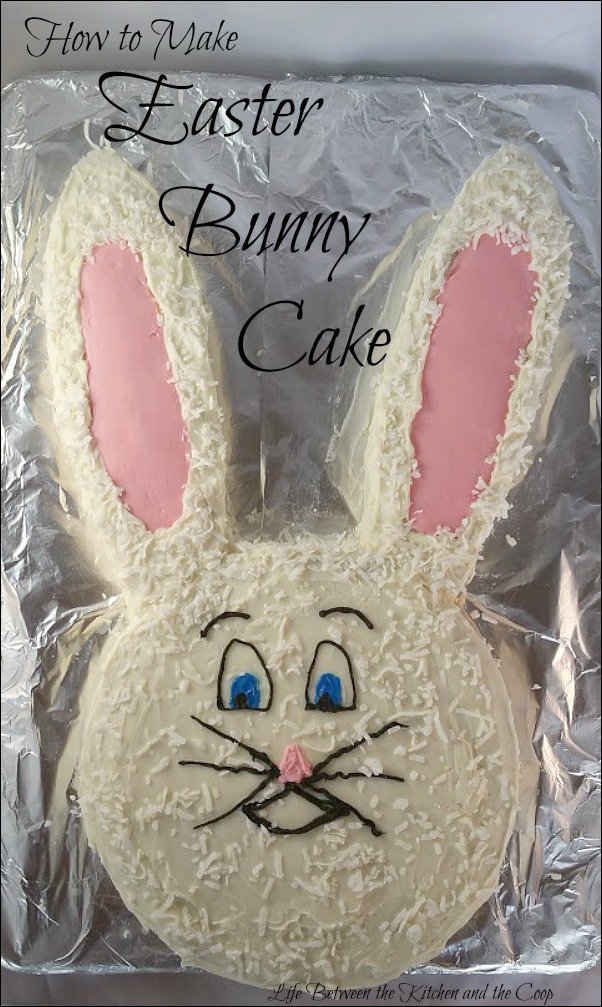
The eyes, mouth, nose, and whiskers get piped on the cake next before you add the coconut flakes to the face.
Once you have done the face, just sprinkle the coconut around lightly (or if you want to be REALLY careful you can place them with brand-new non-germy tweezers!) on the face and you’re pretty much done! You have your cute little Easter Bunny Cake!
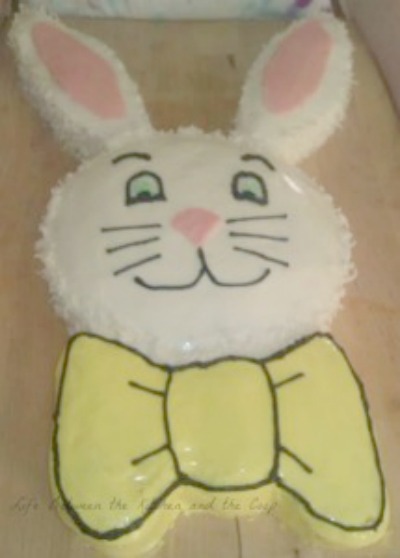
I made a similar Easter bunny cake last year (last year I gave him a bow tie) and I thought that it turned out really cute. Here’s a pic:
Cake decorating tips
- If you’ve never piped frosting before, there are some tips in the video that might be helpful:
- If you ever need to smooth your frosting, dip a butter knife in hot water and then lightly smooth the frosting. It works quite well.
- Be kind to yourself if your first attempt does not turn out well. It just takes practice like anything else. Even after making cakes for several years I had an epic fail when I made a tardis cake for my teenage daughter. CLICK THIS LINK to see my Decorated Birthday Cakes of the Past post and then scroll down through the other cakes I have decorated to check out my Epic Tardis Fail! It will make you feel better about yourself!!! I promise! 🙂
- I have put a couple of affiliate links for great cake decorating products that I like below if you need a little help getting started!
Easter Bunny Cake
Your family will love this cute Easter bunny cake for dessert at your Easter dinner! It's so easy to make that a beginner can do it!
Ingredients
- 2 boxes of cake mix, prepared (one round cake and one 9 x 13" cake)
- 4 containers frosting in the colors you choose
- flaked sweetened coconut
- candy for face, if desired
Instructions
- ****The one thing you need to do differently is BEFORE you put the cake batter into the pans, spray the pans liberally with cooking spray and then put about 1/4 cup of flour in each pan.
- First you need to bake one round cake and one 9 x 13 cake as directed on the package. I think pretty much everyone on the planet knows how to do that, so I am not going to do step by step video for that part ?
- Rotate the pan until the bottom and sides are lightly coated with flour, then dump the excess flour in the trash. This is important! If you don’t do it your cake will stick to the pan when you flip it over!
- After you have baked the cakes, let them cool for a few minutes. When it has cooled for a few minutes, insert a knife along the edge of the cake and go all the way around the cake loosening the sides from the pan.
- Then you will want to trim the excess curve of cake off the top so that it is flat. If you don’t do that when you flip the cake over it will bend and crack.
- Once you’ve done that you gently flip the cake over and onto the tray which you will use for decorating purposes. Remember to make sure the tray that the round cake goes onto is large enough for you to add the ears to later. (I use a large cutting board and wrap it with foil typically.)
- Before cutting out the bunny ears I usually freeze both cakes. It’s easier to decorate cakes when they’re frozen because you get fewer crumbs and avoid breakage of the cake when you glide the knife across it to frost.
- Once both cakes are frozen, draw bunny ears on paper and cut them out.
- Add the bunny ears above the round cake and position them properly. At this point, the cake is still pretty frozen so I usually go ahead and do my crumb coat. (If you’ve never done a crumb coat watch the video below and it talks about it fairly early on my YouTube video later in the post.)
- Once the crumb coat is finished, the cake needs to be frozen again for 2 or 3 hours to make the crumb coat icing firm. If you can’t fit whatever tray you have put the cake on into the freezer, refrigeration works okay, too.
- Once the crumb coat has firmed up, you can start by decorating the inside of the ears with pink frosting (see the picture).
- Then you can frost the rest of the cake with white frosting to cover the crumb coat layer.
- At this point (before you freeze the cake again), you can lightly press coconut flakes into the white frosting if you want, just to give it a little texture. I recommend that you don’t put the coconut on the face until after you’ve already made the mouth, whiskers, nose, and eyes. Check out the video for more detail!
- The eyes, mouth, nose, and whiskers get piped on the cake before you add the coconut flakes to the face.
- Once you have done the face, just sprinkle the coconut around lightly (or if you want to be REALLY careful you can place them with brand-new non-germy tweezers!) on the face and you’re pretty much done! You have your cute little Easter Bunny Cake!
Notes
- If you’ve never piped frosting before, there are some tips in the video that might be helpful.
- If you ever need to smooth your frosting, dip a butter knife in hot water and then lightly smooth the frosting. It works quite well.
- Be kind to yourself if your first attempt does not turn out well. It just takes practice like anything else. Even after making cakes for several years I had an epic fail when I made a tardis cake for my teenage daughter. CLICK THIS LINK to see my Decorated Birthday Cakes of the Past post and then scroll down through the other cakes I have decorated to check out my Epic Tardis Fail! It will make you feel better about yourself!!! I promise! ?
- I have put a couple of affiliate links for great cake decorating products that I like below if you need a little help getting started!
Recommended Products
As an Amazon Associate and member of other affiliate programs, I earn from qualifying purchases.
-
 Wilton Performance Aluminum Pan 8-Inch Round Cake Pans, Set of 2
 -
 Kootek 11 Inch Rotating Cake Turntable with 2 Icing Spatula and Icing Smoother, Revolving Cake Stand White Baking Cake Decorating Supplies
 -
 Wilton 12-Inch Disposable Cake Decorating and Pastry Bags, 100-Count
 -
 Wilton Icing Colors, 12-Count Gel-Based Food Color
 -
 Wilton 46-Piece Deluxe Cake Decorating Set, Cake Decorating Supplies
Nutrition Information
Yield 20 servings Serving Size 1Amount Per Serving Calories 233Total Fat 4gSaturated Fat 2gTrans Fat 0gUnsaturated Fat 1gCholesterol 0mgSodium 401mgCarbohydrates 48gFiber 1gSugar 27gProtein 2g
Have fun trying it out! You’ve got this!
See ya next time!
Deb
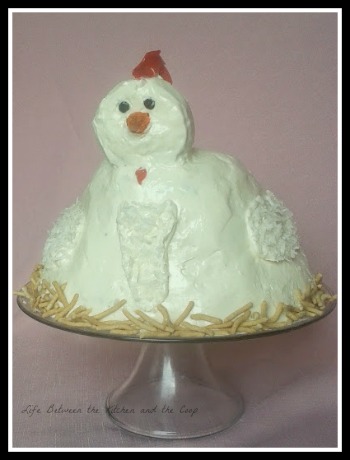
P.S. What would Life Between the Kitchen and the Coop be without a chicken cake? Click here to see how to make the chicken cake I decorated! If you have fun making the Easter Bunny Cake, you might enjoy making the chicken cake, too!


1 Response