Chicken Birthday Cake
Here’s the “recipe” for the finished product of my DIY Chicken Birthday Cake that I made for my hubby! My husband, David, turned 46 this week! I usually make character cakes for the kids’ birthdays (and sometimes for his). This year I was trying to think of something creative to do for him when it hit me…duh…a chicken cake! After all, this is Life Between the Kitchen and the Coop, right? I looked at a few chicken cakes online and then proceded to construct my own.
(Pssst…this cake would also be fun to make for Easter dinner dessert!)
Chicken Birthday Cake
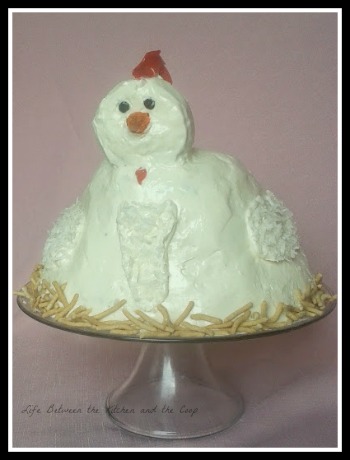
Isn’t she a cute little hen? Read on for the step-by-step how-to’s!
Basic cake decorating tips
First of all, I make no claim at expertise in cake making. My family enjoys my cakes, so I make them, but I’m sure some of you are better at this than me. But…for those of you who haven’t decorated a cake before, here are a few tips…
- When you bake your cakes, grease and flour your cake pan. That way when you turn the pan over the cake will pop out easily and (hopefully) in one piece.
- If you need to cut the cake pieces into shapes other than the shape of the pan the were baked in, lay a piece of paper or lightweight container that is the shape you want on top of the cake and then slowly and gently cut the shape out with a serrated knife, held vertically, being very careful not to tear the cake when cutting.
- Before frosting between each layer, freeze the layers separately. If the layers are frozen before you frost them, you can frost them with less chance of tearing up the cake, not to mention you will get less crumbs.
- A tool that is handy to have around when cake decorating: kebob skewers, for fine detail corrections that your fingers are too big to do without messing up.
- I recommend frosting the outside of the cake twice — a crumb coat and then the final coat of frosting — that is explained with the pictures below.
- Finally, if you need to smooth your frosting out on your cake, dip a butter knife in a glass of hot water, then gently run it across the frosting to smooth it out. If needed, wipe the knife and repeat.
How to Assemble the Chicken Birthday Cake
Now…as far as assembling our DIY chicken-shaped cake went, I just baked two 9″ x 13″ cakes (one yellow cake and one chocolate cake, but you can do whatever flavor you like). I cut a large circle out of one cake and a slightly smaller circle out of the next. Those are your bottom two cake layers (see below). On top of those I made yet another layer that was an even smaller circle. I didn’t feel like making another cake so I just pieced together remnants from the cake I had already made, then gently whittled away the angle of the chicken’s back on the chocolate side with a serrated knife.
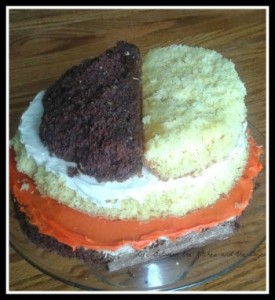
When sculpting the chicken’s back, as you can see I did not do it perfectly. I don’t think it mattered. Chickens are ruffly birds anyway!
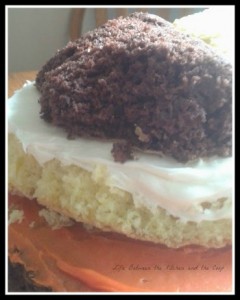
Once those three layers are assembled and stuck together with frosting between the layers, I did the “crumb coat”. That just basically means I did a somewhat quick and sloppy frosting layer to seal in the crumbs. Some orange is visible from between two of the cake layers. That doesn’t matter. The final frosting layer will cover it. Next, I stuck in two kebob sticks vertically where the head/neck was going to attach. Those sticks give support so that the chicken cake’s head doesn’t fall off! 🙂
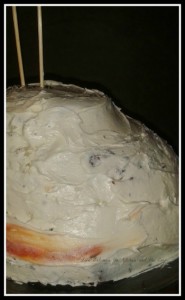
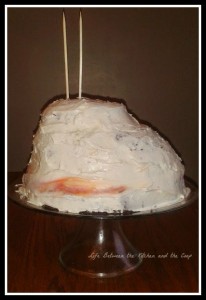
Now my plan originally for the head and neck was two invert two Little Debbie Chocolate Cupcakes on each other with a little frosting between them, and then slide them down the skewers. The main reason I chose not to use regular cake for the head is that since it is a proportionally small piece, I worried that a less dense piece of regular cake would just break off. Little Debbie Cupcakes are nice and dense, even with the cream filling. Unfortunately, my kids left me with only one cupcake left, so I had to improvise. I pulled one of skewers out of the cake and cut the other skewer shorter with a wire cutter, so that it was just long enough to hold on the cupcake “head” which I placed on its side (see below).
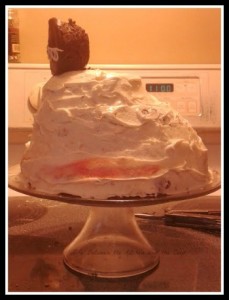
After I crumb-coated the cupcake, I froze the cake for a couple of hours to firm up that layer of frosting. Then I put on the outer layer of frosting and smoothed it with a butter knife that I had dipped in hot water. Once the whole outer frosting layer was done, I was ready to do the face.
For the chicken’s comb, I laid a strawberry fruit roll-up out flat on a plate for a day or so, then cut out the comb with a scissors and pressed it into the frosting (see chicken cake head shots below).
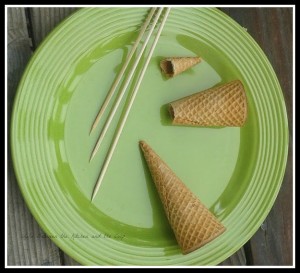
For the beak I used a sugar ice cream cone. With a serrated knife I slowly and carefully cut off the tip, which I then frosted orange and pressed into the middle of the face to look like a beak.
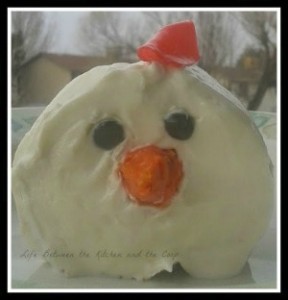
The eyes I just did freehand with some of that black gel that you can buy by the frostings at the grocery store. If I had it to do again, I think I would have pared down the sides of the head a bit to make it more oval shaped.
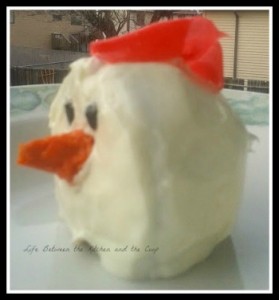
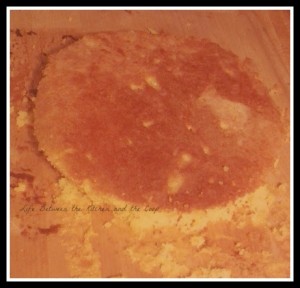
I decorated the chicken head while it was already on the cake and I recommend that you do that, too, so that a decorated chicken head doesn’t get messed up when you try to put it on the cake. The pictures of the head in a separate bowl (above) were actually from after we sang happy birthday and cut the cake. As you can see below we used some chow mein noodles for straw for the chicken cake to sit on. That was my husband’s idea. Clever, huh? 🙂
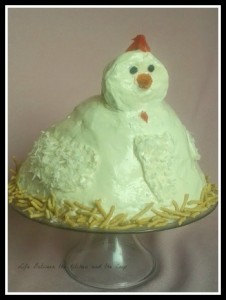
Anyway, that, my friends, is how you assemble a chicken-shaped cake. Why pay a bakery to make your cakes? Just DIY them! If only I had a couple of Cadbury eggs to sit along side it. Maybe I will make another one at Easter!
See you next time!
Deb
P.S. If you like this post, I think you might also like Decorated Birthday Cakes of the Past!
Follow me on Bloglovin’!


1 Response